
CodeIgniter කියන්නේ වර්තමානයේ බහුලව බාවිතා වන open source web application framework එකක් ..CodeIgniter site එකෙන් නොමිලේම download කරලා install කරගන්න පුළුවන්.codeIgniter වල බාවිතා වෙන්නේ MVC design pattern එක..
Model-View-Controller(MVC) Development Pattern
MVC කියන්නේ software design pattern එකක්.සාමාන්ය web architecture එකේදී වෙන්නේ web browser එක web page එක සමග ගනුදෙනු කරලා output එකක් ලබා දෙන එක..සරල ලෙස මේ විදිහට පෙන්නන පුළුවන්..මේ file එක ඇතුලේ සියලුම logical operations,database interactions ඇතුළුව සියලුම දේ තියෙන්න පුළුවන්.
MVC architecture එකේදී වෙන්නේ මේ සියලුම දේවල් එක page එකක බාවිතා නොකර එය models,views,controllers ලෙස කොටස් වලට වෙන් කරලා බාවිතා කරන එක..
controllers- controllers වලින් සියලුම decisions පාලනය වෙනවා.
models-models මගින් සිදුවන්නේ data handling
views- views වලින් වෙන්නේ සියලුම user interfaces(presentations) handle කරන එක.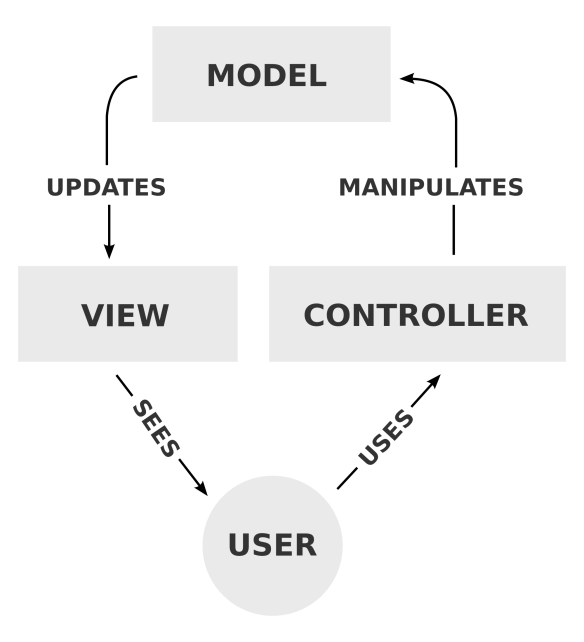
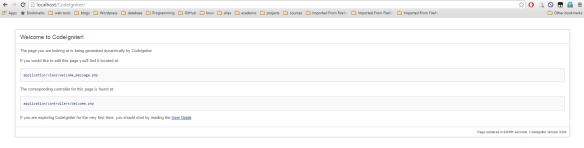
CodeIgniter install කරගත්තම මේ විදිහට default page එකක් බලාගන්න පුළුවන්.
 CodeIgniter URL processing
CodeIgniter වල URL එක call කරන්න ඕන මේ පිළිවෙලට
basic url:/ {controller}/{method}/{arguments}
උදාහරණයක් ලෙස default page එකට අදාළ url එක සලකමු..![]()
මෙහිදී basic url- http://localhost/CodeIgniter/index.php
welcome controller එක තුල තියෙන index method එක call කරාම මේ විදිහට view එකක් බලාගන්න පුළුවන්.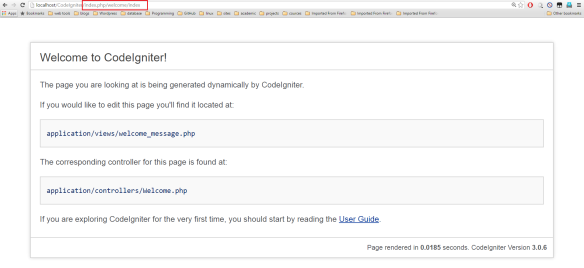
application =>controllers=>Welcome.php තුල තමා welcome controller එක තියෙන්නේ..
<?php

 defined('BASEPATH') OR exit('No direct script access allowed');

 class Welcome extends CI_Controller{

      public function index(){

           $this->load->view('welcome_message');
	}
}
මේ index method එකෙන් application=>views=>welcome_message.php තුල තියෙන html code එකට අදාළ view එක ලබාදෙනවා.
(extends වලින් වෙන දේ ගැන මෙතනින් බලන්න පුළුවන් )
අලුත් Controller එකක් හදන්නේ කොහොමද?
application=>controllers folder එක ඇතුලේ තමයි සියලුම controllers තියෙන්න ඕන.
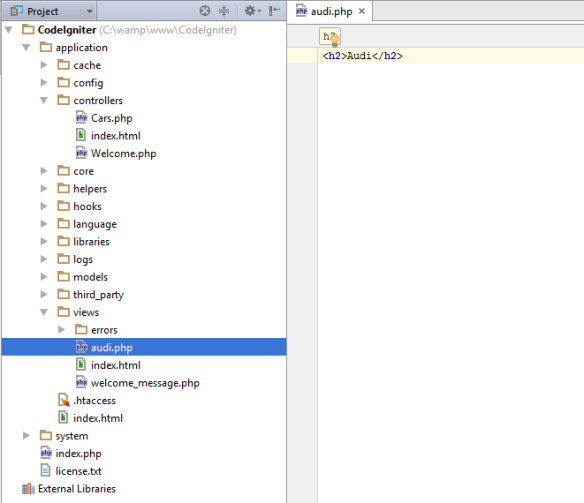
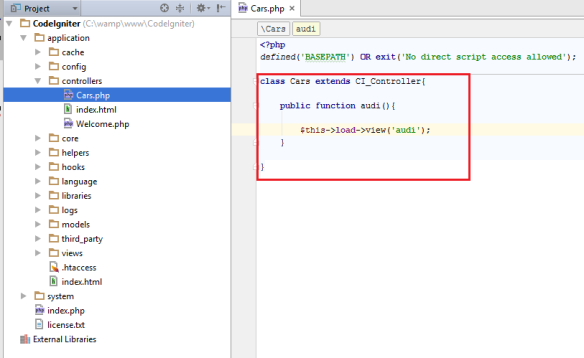 මෙහි Cars.php file එක ඇතුලේ Cars controller එක හදලා තියෙනවා..Cars controller එක ඇතුලේ audi() method එක තියෙන්නේ..මේ method එක call කරාම views folder එකේ තියෙන audi.php එකට අදාළ html view එක ලබාදෙන්න ඕන..
$this->load->view(‘audi’); මේකෙන් සිද්ද වෙන්නේ ඒ දේ.
 දැන් controller එක සහ එයට අදාලව view එකක් හදාගෙන ඉවරයි.දැන් මේ view එක browser එකේ පෙන්නන ඕන..කලින් කිව්ව විදිහට base url එකේ ඉදන් {controller}/{method} මේ පිළිවෙලට තමා url එක process වෙන්න ඕන.
 models
කොහොමද models බාවිතා කරන්නේ..model එක ඇතුලේ සාමාන්යෙන් තියෙන්නේ
1.Application data
2.Logic and Business Rules
3.Functions
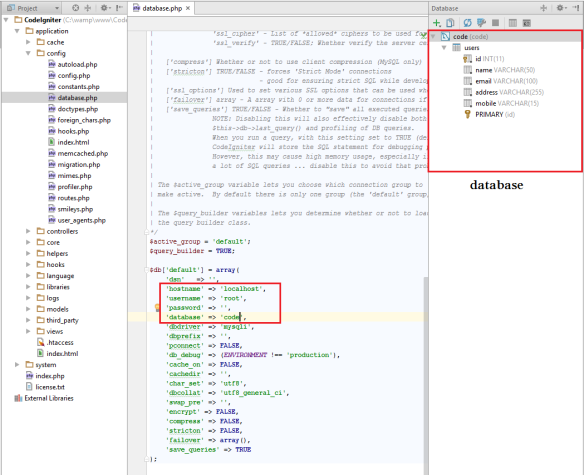
අපි දැන් හදන model එකට database connection එකක් අවශ්ය වෙනවා.එකට database configurations හදාගන්න ඕන.
application=>config=>database.php
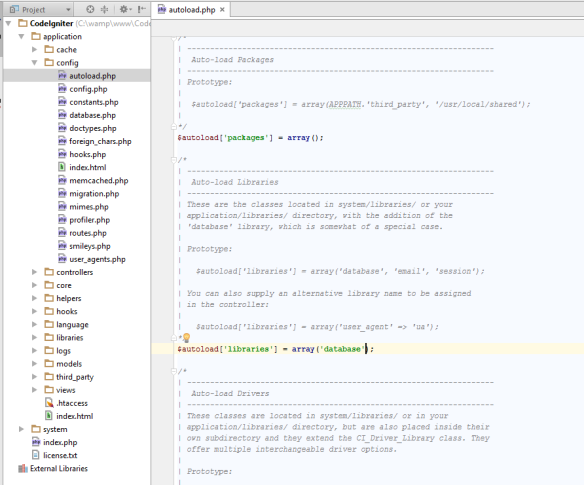
 ඒ වගේම autoload libraries වලට database library එක add කරන්න ඕන.මෙහිදී සිද්ද වෙන්නේ background එකෙන් database එක autoload වෙන එක.
application=>config=>autoload.php
 දැන් අපිට database එකේ තියෙන data ලබාගන්න model එකක් හදන්න පුළුවන්..
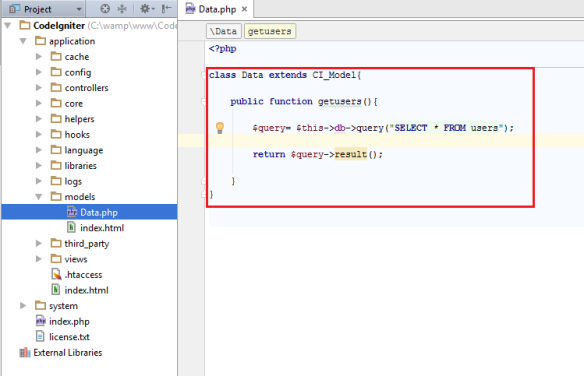
application=>models folder එක ඇතුලේ Data.php file එකේ තමයි Data model එක තියෙන්නේ.getusers() method එකෙන් තමා database එකෙන් data ලබාගන්නේ.
public function getusers(){

        $query= $this->db->query("SELECT * FROM users");

        return $query->result();

    }
මේ method එකෙන් users table එකේ තියෙන සියලුම data array එකක් විදිහට controller එකකට pass කරන්න පුළුවන්..කලින් හදාගත්ත Car controller එකේම Data model එක call කරන්න පුළුවන්.
public function getusers(){

        $query= $this->db->get("users");

        return $query->result();

    }
මේ විදිහට get method එකෙන් සියලුම data fetch කරන්නත් පුළුවන්… දැන් Car controller එකේ Data model එක call කරමු..
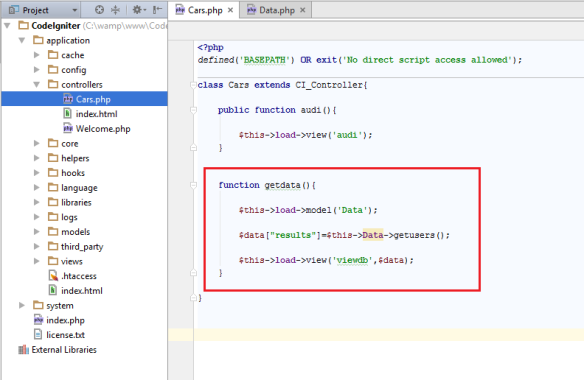 getdata() method එකෙන් තමා model එක call කරන්නේ..
$this->load->model(‘Data’); —–> Data model එක controller එකට load වෙනවා
$data[“results”]= $this->Data->getusers(); —-> Data model එකේ getusers() method එක call කරනවා..මෙහිදී return වෙන array එක $data variable එකට assign කරගන්නවා
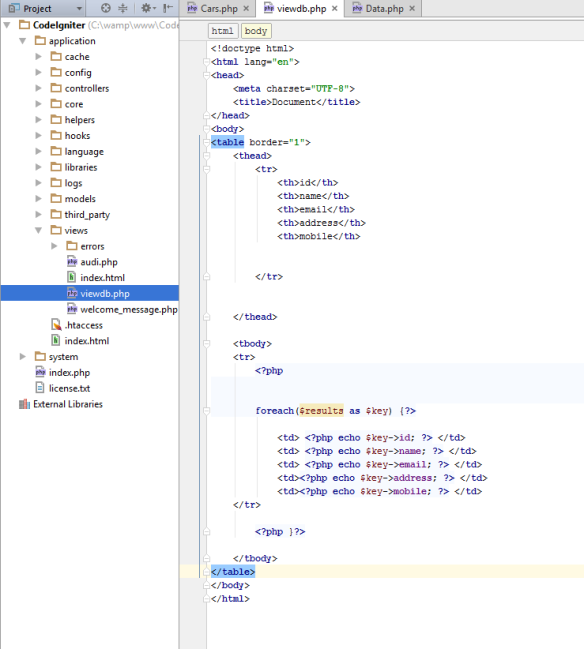
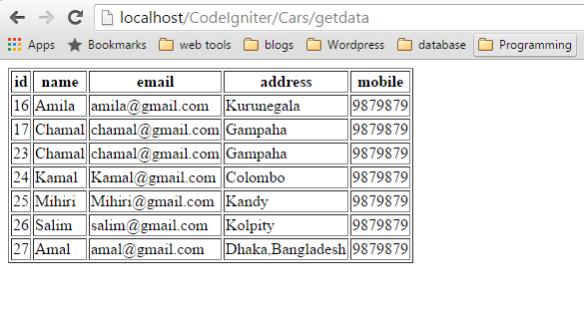
$this->load->view(‘viewdb’,$data); —–> views folder එක තුල තියෙන viewdb.php file එක load කරනවා..ඒ අතරම viewdb.php file එකට $data array එක pass කරනවා.
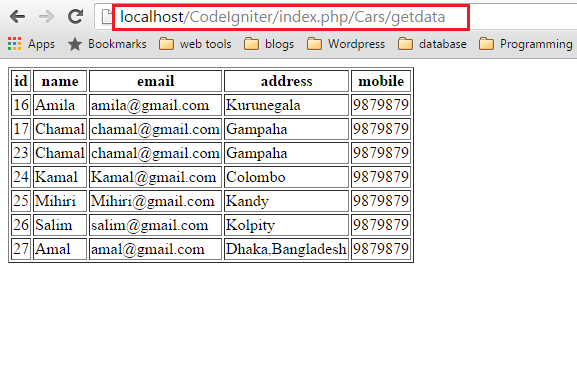
viewdb.php file එකේ table එකක මේ data පෙන්නන පුළුවන්..
 codeigniter configurations
codeigniter වල සෑම request එකක්ම index.php file එක හරහා run වෙන්නේ..ඒ නිසා url එකේ index.php අනිවාර්යෙන්ම තියෙන්න ඕන..නමුත් url rewrite කරලා අපිට මේ index.php අයින් කරන්න පුළුවන්.. root directory එකට .htaccess file එකක් add කරලා url rewrite කරන්න පුළුවන්.මේ සදහා apache server එකේ rewrite_mod active කරලා තියෙන්න ඕන .
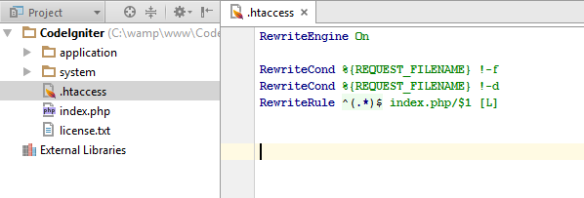
RewriteEngine On

RewriteCond %{REQUEST_FILENAME} !-f
RewriteCond %{REQUEST_FILENAME} !-d
RewriteRule ^(.*)$ index.php/$1 [L]
දැන් index.php නැතුව run කරන්න පුළුවන්..
 routing
controller එක සහ එයට අදාළ method එක බාවිතා කරනවට වඩා පහසු අර්ථ සහිත url එකක් හදාගන්න පුළුවන් routing system එකෙන්..
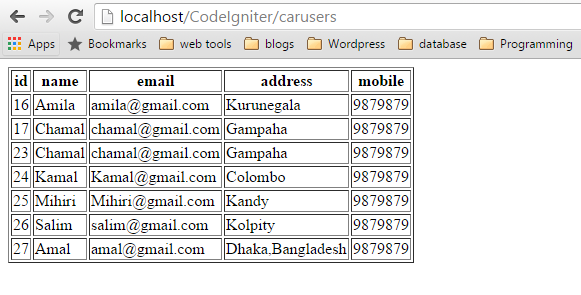
Cars/getdata කොටස carusers ලෙස rewrite කරන්නේ මෙහෙමයි..
application=>config=>routes.php
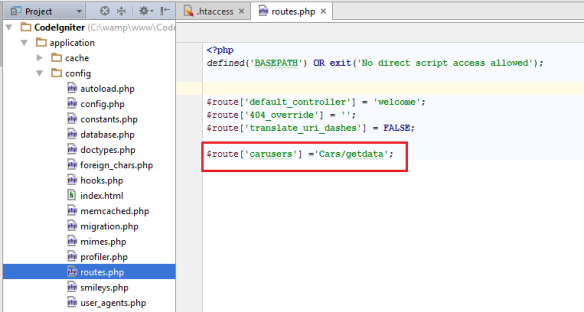 $route[‘carusers’]= ‘Cars/getdata’;
 දැනට ඉවරයි …comment එකක් දාලම යන්න!!!!!!!!!!!!!!!!!!!!!!!!

Machan pattai. (Y)
LikeLike
Thanks
LikeLike
Great Work Machan 🙂
LikeLike
Thanks
LikeLike
Machn niyemetama pahadili krala tiyanwa.
Great work Rajith. Keep it up and we will waiting for your next post too.
LikeLike
Thanks emaa
LikeLike
oya maraine 😀
LikeLike
thanks
LikeLike
Godak watinawa ayye. Thank you!
Codeigniter gana thwa post danna ayye puluwannam….
LikeLike
thanks
LikeLike
Thank you very much Rajith!
LikeLike
welcome
LikeLike
Haa patta mcn. grate work
LikeLike
thanks
LikeLike
Patta bro…thanx a lot…keep it up
LikeLike
Thanks
LikeLike
niyamai lamaya… 🙂
LikeLike
THANKS
LikeLike
Ela bro.. (Y) keep up the good work!!
LikeLike
Thanks
LikeLike
patta machan.thankzz !!!
LikeLike
welcome bro
LikeLiked by 1 person
Thank you so much macho
LikeLiked by 1 person
welcome
LikeLiked by 1 person
Great work..keep it up!
LikeLiked by 1 person
Thanks
LikeLiked by 1 person
I don’t know about this . But your works are going well. 👌 perfect mcn.
LikeLiked by 1 person
thanks
LikeLiked by 1 person
NIce one machn! Keep it up! 😀
LikeLiked by 1 person
Godak watinawa mcn… keep up bro… if u can add database -> xml -> foreach method in codeigniter bro
LikeLiked by 1 person
thanks bro.. ill add ASAP
LikeLiked by 1 person
. THANKS
LikeLike
. THANKS
LikeLike
thank you
LikeLike
.
LikeLike